Earth
The Ultimate Rappelling Rope Guide: Uplift Your Rappelling Game

Jan
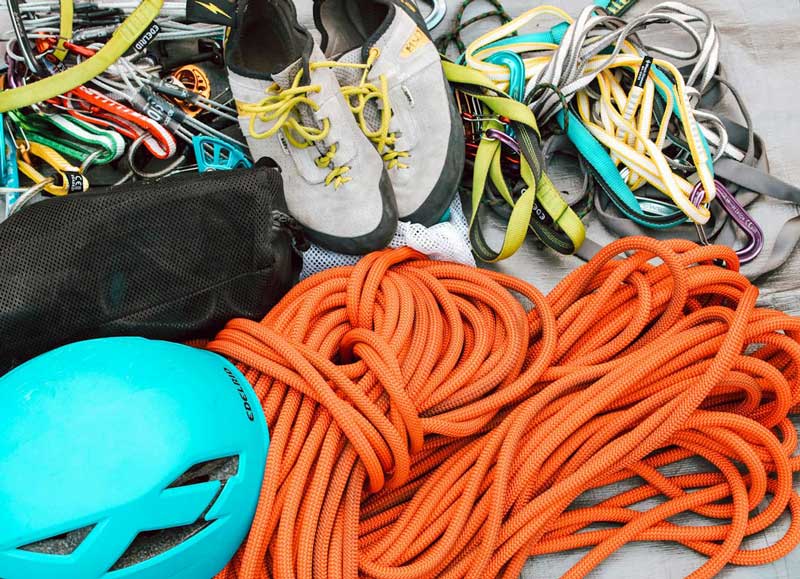
If you are thinking about going on a climb, you must check if you have the correct rope before anything else. The better decision you make, the safer your rappel will be.
Thanks to modern manufacturing techniques, quality assurance, and tight safety rules, the basic rope has never been so robust, lightweight, and lasting. But how can you know which is the best option for you when there are so many?
So if you’re considering purchasing a new hiking rope, we’ve put up this simple buying guide to assist you in making the best and safest purchase possible.
Table of Content
Rappelling Rope Size
Rope size impacts performance, so many climbers keep a range of ropes to meet their various requirements. For instance, they have a thick workhorse for top-roping and a tiny rope for alpine climbing.
Rappel Rope Diameter, Strength & Length
Here is some more information on the diameter, strength, and length of a rope and how each factor can influence your decision to select a string.
- Diameter
The climbing rope diameter relates to how thick or thin the rope is. You will find ropes as thin as 5mm.Thinner strings provide a smoother feel, are easier to clip, and reduce pack weight. However, the skinnier a rope is, the less lasting it will be. As a result, your initial cable for top-roping and early climbs should be relatively thick: around 11 mm. It will withstand the friction against the edge and most likely survive longer in the long run.
You can progress to a slimmer rope once you’ve gotten more experience hiking and managing the string while abseiling. 8mm ropes however work great in all situations.
- Strength
The strength of the rope is linked to its diameter. The thicker the rope, the more strength it will have. Strings with a larger diameter like 11mm will be more abrasion-resistant and can frequently withstand more frequent use. Skinnier ropes are lightweight but are also less durable and need more ability to belay securely.
Another thing that affects the strength of rope is its material. Nylon ropes are the strongest in terms of shock absorption or rock abrasion resistance.
- Length
Rock climbing dynamic ropes are available in lengths ranging from 30 to 80 meters. A 60m rope is the industry standard and will usually be enough.
When choosing a rope length, keep in mind that half of the rope’s length must be equivalent to or more than the course you’ll be hiking. For example, if an outdoor climbing course is high -around 30 meters long, you’ll need at least a 60-meter rope to ascend and return from an anchor at the summit.
Because indoor climbs are smaller than outdoor courses, shorter ropes, around 35m long, are typically utilized for gym climbing.
What Size Rope is Best for Rappelling?
The ideal rappelling rope size diameter is 10-11mm in length. This diameter provides the best strength for your rope and means you can have a smooth yet secure outdoor rappelling experience. In general terms, the larger the diameter, the more durable your rope will be.
6mm Rappel Rope
With correct technique and practice, you may rappel on ropes as thin as 5-6mm. Skilled rappelers utilize 5mm ropes because it’s light enough to take you wherever you go while being strong enough to assist you on the way down.
However, a 5mm rope can be difficult, and it frequently necessitates the use of specialized gear, friction-adding carabineers, or strong backup knots. As a result, I wouldn’t advocate rappelling with a rope that is 5mm of 6mm. Infact it should ideally a nylon rope around 8mm.
Can You Rappel on 8mm Rope?
Your rope of choice varies depending on the activity you want to do. Still, the ideal strings for rappeling are lightweight static lines with a diameter of over 7.7mm. So, if you have a nylon 8mm rope, you can comfortably rappel high hills from it – regardless of your weight. This is true independent of the rappel gadget or technique you choose.
Types of Rappelling Ropes
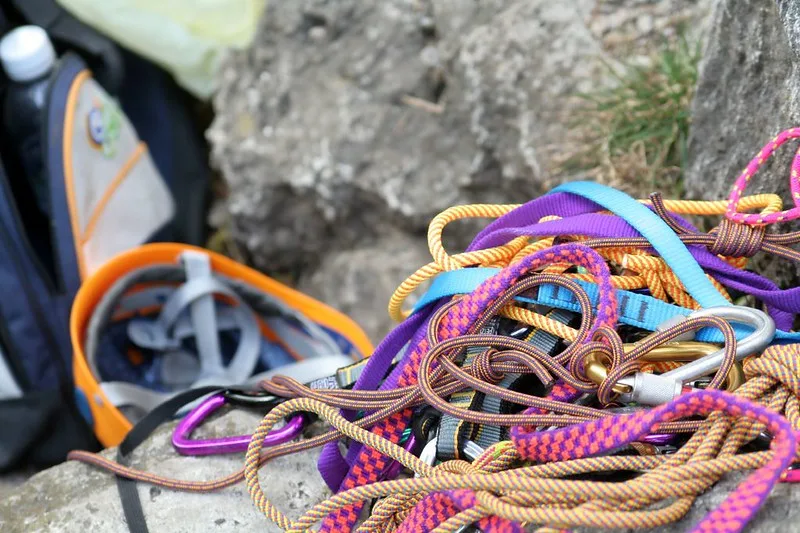
There is a long list of the types of ropes available. However, there are two main categories for rappelling ropes: Static and Dynamic Cables. Dynamic is further divided into single, half, and twin ropes. There is more on each of these below!
Static Ropes
Consider rappelling using a dynamic, elastic rope. It’d be annoying, particularly if you were attempting to climb. You would climb, and then the rope would stretch, bringing you back down – not exactly ideal.
Static ropes are braided ropes comprised of two parts: a core and a sheath. Individual strands make up the core, which serves to sustain the load. The sheath keeps the strands together while also protecting the core from damage. The sheath is thick, so it can withstand abrasions from rocks. If properly cared for, this rope should last for a long time.
These ropes are generally used to construct top-rope anchors, rappel, transport cargo, conduct rescue operations, and pull automobiles out of ditches, among other things. They don’t stretch much (less than 5%), so they might break you like a branch if you used one for mountaineering and fell.
Dynamic Ropes
Dynamic ropes are ideal for various reasons. To begin with, they make a fall considerably gentler by extending and absorbing a significant amount of energy. Dynamic strings are also significantly gentler on the climber’s body since the stretch helps to reduce jarring and injuries. If you want to climb using a dynamic line, you have three options: single, half, and twin ropes.
Single
The vast majority of outdoor climbers purchase single ropes. The term “single” refers to a cord that is designed to be used alone.
Single ropes come in a variety of diameters and lengths, allowing them to be used for a variety of climbing sports. They’re also less complicated to operate than two-rope setups.
Half Rope
Rappelling with two ropes is done while climbing with half ropes. Hook one cord to the left-hand side and the other to the right-hand side as you ascend. This permits the cords to run parallel and stay upright, decreasing rope drag on wandering paths when executed right.
The advantage of using half ropes is that tying two ropes together for rappel lets you go double the distance you might cover with a single string. Also, if one cord is injured during a fall or is cut by rocks, the other acts as a backup.
They do, however, need more expertise and effort to handle. You also need to consider that the weight of two ropes will be more than the weight of a single string.
Twin Rope
When using twin ropes, you must clip both ends through each point of protection, exactly as you would if using a single string. Because there will be greater rope drag with twin ropes, they are a suitable choice for non-wandering trails. On the bright side, twin ropes are often slimmer than half ropes, resulting in a lightweight and less cumbersome setup.
Static vs. Dynamic Rope for Rappelling

Most people remain confused about static vs. dynamic rope for rappelling activities. Ropes are divided into two categories: dynamic and static. Dynamic ropes mitigate the impact of a falling climber by stretching to absorb the stress.
Static ropes, on the other hand, are good for dropping an injured climber, ascending a string, or pushing freight up since they have very little flexibility. Because static ropes were not created, validated, or certified for such weights, they should never be used for top-roping or lead climbing. Consider these factors when choosing if you should use a static or dynamic rope for rappelling.
Best Static Rope for Rappelling
If you are wondering what the best static rope for rappelling is or which best suits you remember that your choice of rope will vary based on what activity you intend to perform. Still, the best ropes for pure rappels are lightweight static ropes that are at least 7.7mm in diameter. The most essential factor for rappelling rope selection is the string’s diameter.
Rappelling Rope Static Elongation
The degree to which a rope extends with an 80kg weight dangling on it is known as static elongation or its working elongation. It is given as a percentage of the rope’s length. Elongation on single and double ropes is limited to 10% of the total rope length, while half ropes are limited to 12%.
When top-rope climbing, pulling gear and climbing fixed ropes with climbers, static elongation is vital to consider. Static elongation often signals less effectiveness because energy is squandered during cable stretch.
Best Dynamic Rope for Rappelling
You’ll probably just need the rope for rappelling, but you never know when you’ll need it to defend a high climb. As a result, a single 10mm dynamic string or a pair of 7.7mm dynamic twin-ropes is the ideal option.
Rappelling Rope Dynamic Elongation
The extent to which the rope extends during the initial UIAA fall is known as the dynamic elongation. Greater elongation implies a longer fall; thus, a lower value is preferred since less extension may save a falling climber from colliding with a slope or the floor.
On the other hand, lesser dynamic elongation indicates a greater force of impact on the hiker, belayer, and his gear. Ropes must not extend more than 40% of their whole length, according to the UIAA.
Rappelling Rope Knots

There are many knots worth knowing as a climber, but for the most part, these seven fundamental rappelling rope knots will have you sorted:
1. The Figure-8 Retraced
The Figure Eight knot is often used as a stopper knot to keep a line from passing through a piece of hardware (like a carabiner or pulley). It is simple to examine after being loaded in a fall and simple (enough) to untie. It is advised that the tail be at least six inches long.
Watch the video to learn how to tie the Figure 8 Retraced knot.
2. Girth Hitch
This is a knot for connecting climbing slings to different elements such as your harness’s belay loop or anchor bolt hangers. It’s simple to tie, can be done with one hand, and may be used in various settings. The guideline is that slings should never be left girth-hitched to your harness belay loop for long durations.
Watch the video to learn how to tie the Girth Hitch knot.
3. Clove Hitch
This is a knot for connecting a climbing rope to a carabiner rapidly. This is ideal for securing yourself to an anchor. When utilizing the cord to equalize an anchor, the clove hitch comes in helpful. It’s simple to knot and untie. Even after being tied, it’s simple to alter and adjust. It may be knotted with one hand and clipped rapidly to an anchor or bolt.
That being said, Clove hitches start to slide at a certain pressure, which is why they are typically used in conjunction with another knot, like as a Figure-8 on a bite, when securing yourself into an anchor.
Watch the video to learn how to tie the Clove Hitch knot.
4. Munter Hitch
A knot that lets you belay or rappel on a rope with only a single locking carabiner and no other gear. So, if you forget your conventional belay/rappel equipment, this knot might save your life. It is advised to use this product is only in an emergency. The Munter Hitch kinks the rope badly, especially when rappelling.
Watch the video to learn how to tie the Munter Hitch Knot.
5. Double Fisherman’s
This knot is used to join the ends of two cords or ropes. To make a prusik, you can tie this knot. It will eventually fuse itself tight, making it hard to unravel. This knot should only be used to connect two lengths of rope or cable. If you want to connect two pieces of tubular webbing, use a water knot.
Watch the video to learn how to tie the Double Fisherman’s.
6. Prusik
It is a method of securing a cord length to a (stronger) climbing rope. The primary purpose is to provide support for your rappel equipment. It’s simple to knot and untie, and it could come in handy more often than you think. You can climb a fixed-line using two prusiks, maybe getting oneself out of a predicament. Remember to check for red flags/rules, such as clean loops/coils.
Watch the video to learn how to tie the Prusik.
7. Euro Death Knot
This knot is used to link two climbing ropes together. It’s simple to tie and untie both. One of the main advantages of the knot is that you are less prone to become entangled in rock features during the rappel. It is recommended to leave a tail of at least 8 to 12 inches.
Watch the video to learn how to tie the Euro Death Knot.
How to Choose Climbing Ropes
If you’re considering purchasing a new climbing rope, we’ve put up this simple guide to buying to assist you in making the safest and most efficient purchase possible. You do not want to regret not thinking about this earlier when you are halfway up a cliff, sweating, getting injured by rock structures.
There are 4 significant factors to consider when selecting a rock climbing rope. Make a list of what you want for this trip and plan accordingly.
- The most important—and frequently the most perplexing—question: what diameter is best for the style of climbing you do? How long do you think it should be?
- Which rope type is most suitable? Static or Dynamic?
- Do you prefer a cable with a bi-pattern or a central mark?
- The Safety Ratings for the rope
We have already discussed in detail the first two factors. We now know about the diameter, length, strength, and type of the rope and their role. Let’s consider a few situations where these factors will come into play.
When abseiling off a climb, you’ll almost definitely be using the same cable you used for ascending in this case. Always climb with a good-quality, dynamic rope with at least 10mm diameter.
Suppose you have only set out for rappelling as the main adventure. In that case, you probably don’t need a dynamic rope unless you’re going on a hardcore rappelling trip. Static ropes are less expensive and do the same job; just make sure your rope is at least 7.7mm in diameter.
Mountaineering is a difficult sport to master. You’ll probably just need the rope for rappelling, but you never know when you’ll need it to defend a climb. As a result, the ideal option is either a single 10mm dynamic rope or a set of 7.7mm dynamic twin-ropes.
If you’re panicking or on a solo trip, it’s good to have a backup rope on hand. This rope should be compact and easy to transport. As a result, I will recommend using a 6mm static rope.
Key Features to Consider
Additionally, when assessing climbing ropes, examine them for some key features. They can make a significant impact in terms of performance and usability.
The first important trait is dry treatment. When a rope gets wet, it becomes bulkier and less able to endure the stresses created during a fall. A string becomes rigid and problematic when it becomes chilly enough that the absorbed water freezes. Some ropes include a dry treatment that decreases water absorption to prevent this. This however comes at an additional price.
To assist you in locating the midpoint of the rope, many ropes include a black center mark, which is usually black dye. Certain strings are bicolor, which means they have a weaving pattern shift that demarcates the two halves of the cable and produces an easily identifiable center mark. Let’s say the rope is black and white. When the black part of the rope ends, you will know half of the rope has been utilized. Some ropes come with black marks at the rope’s end that caution the rappeller that the string is coming to an end.
Another thing to check before choosing a rope is its safety rating. You’re good to go as long as your cable has the UIAA label.
How to Rappel With Just a Rope
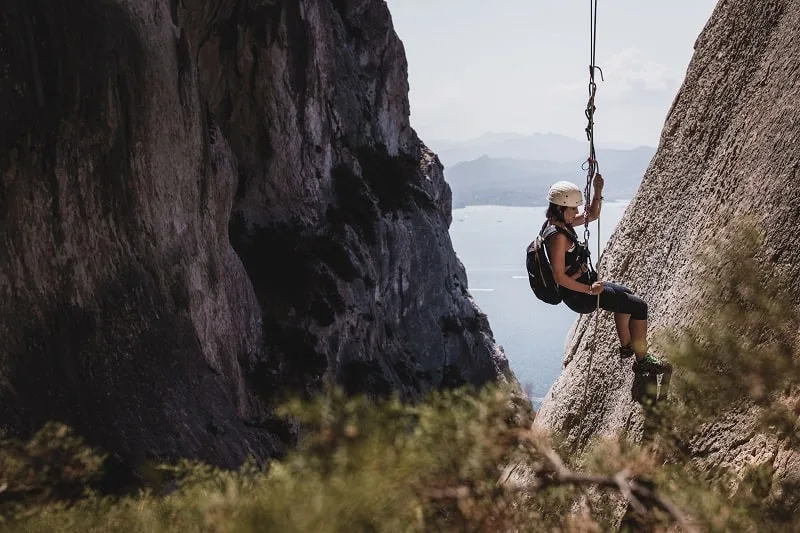
There are three popular rope rappelling techniques to rappel with just a rope: a Dülfersitz rappel, an arm rappel, or a South African rappel style.
However, various circumstances will impact which of these methods is best for you. So, suppose you’re thinking about how to rappel with just a rope. In that case, it’s critical to understand the fundamental differences between these approaches, analyze your situation, and choose the best strategy.
The Dülfersitz, or body rappel, is a classic, non-mechanical rappelling technique that requires looping a rope around oneself to manage your drop. This cable rappelling technique makes perfect sense if your feet can reach the slope’s surface. The rope has to go below your thigh and cross over to the other shoulder in the shape of the letter ‘Z.’
With one hand, grab the rope that hangs behind your shoulder. This is referred to as the brake hand, and it should be on the same side as the leg that the string will be placed beneath. Push your feet off the ground and move the brake hand away from your body after you’ve got everything under control.
The South African rappel is most suitable when there is a cliff wall from which to drop and bounce. Take both ends of the rope and cross them behind your back to pull it forward. Both strings should be freely dangling between your legs. Return these ends to your crotch area, but this time from below. Loop the rope over your hand and slide it to your side. You will lean back and begin your descent when you let go of the string in your hand.
The Arm Rappel technique is best used on sloping terrain that may be slippery due to loose rock or even rain. This is because maintaining a good grip in such situations may be quite challenging. This method is relatively straightforward. It’s as simple as running the rope around your back. Wrap each arm around the cord to sit between the forearm and the bicep. Wrap it once more so that it lies in your palms. Take both sides of the rope and gently fall.
FAQs
- How to retrieve?
The most common approach for a single rope rappel retrieve is to transfer the hefty knot that connects the two rappel ropes down the cliff. The knot will frequently hang up on the ledge’s edge when standing on a ledge. Move the knot below the ledge, try to avoid any rock, and have your friend try to pull once again. This generally resolves the issue.
- How much is a rappelling rope?
The price of the rappelling rope will depend on its type, length, diameter, and features it has. For example, a dry-treated cord will be more expensive. However, the general price range for good quality rappelling ropes is $190-$290.
- How to secure rappelling rope?
It is essential to carry additional gear that supplements your rope for climbing safety. Ensure that you fasten the cord on a sturdy anchor, have a length long enough for your rappel, and avoid reusing the string for multiple climbs.
- How do I get my rope back after rappelling?
Unfasten your rappel gear and undo both safety knots from each end of the line once you’re on the bottom. To rescue the rope, simply grasp one end of the rope and pull after the knots are loosened. Pull the other end of the rope upwards till it slips through the rappel hooks and lands at your shoes.
- Do knots weaken the rope?
Yes. Rappelling rope knots put the rope under tension. The length discrepancy causes stress across the rope’s breadth, weakening its strength.
Conclusion
We have provided you with the basic information to guide you in selecting your rope. However, the best rappelling rope is determined by the circumstances in which it will be used. When choosing a string, think about what you’ll use it for, how high is the climb, make a list of what gear you’ll bring, and how much load you want to take. Your choice of rope may change depending on the activity, so be sure to pack the appropriate equipment and remain safe!